How to Wrap a Box With Ribbon Perfectly?
Wrapping a box with ribbon can be a delightful yet challenging task. The goal is to make the gift look stunning. However, achieving a perfect Box With Ribbon often requires practice and patience. It’s easy to become frustrated when the ribbon twists or the bow doesn’t sit right. Don’t worry; that’s part of the process.
Imagine holding a beautifully wrapped box that captures attention. The ribbon should add elegance and charm. Yet, it’s common to struggle with placement and tension. You may find yourself needing to start over. This experience is not uncommon. Each attempt is an opportunity for refinement.
Take a moment to enjoy the process. Focus on the colors and textures of the ribbon. A good wrap enhances the gift inside. Even if it takes several tries to get it just right, the effort is worth it. Remember that perfection is subjective. Each Box With Ribbon tells a story, even the imperfect ones. Embrace the journey of creating beauty through simple, thoughtful wrapping.
Choosing the Right Type of Ribbon for Gift Wrapping Based on Material Properties
Choosing the right ribbon is crucial for perfect gift wrapping. Different materials have unique properties that affect their appearance and durability. Satin ribbons are smooth and shiny, making them ideal for glamorous gifts. They look elegant but can be tricky to tie neatly. They may slip easily, and those knots can come undone.
On the other hand, cotton ribbons provide a more rustic charm. They tend to hold shapes well, giving you control over bows and loops. However, they may not have the same sheen as satin. This difference can impact the overall vibe of your gift. If the colors clash or do not complement the wrapping paper, the effect can be disappointing.
Consider using wire-edged ribbons, as they are versatile. They can be shaped and styled with ease. But, they might not have the softness you desire in a delicate wrapping. You may find that certain ribbons snag easily or do not hold their form as intended. Each choice comes with its pros and cons, leading you to rethink your selections. Make sure to test your ribbon choice with actual wrapping before the final gift presentation.
Understanding Different Ribbon Widths and Their Impact on Aesthetic Appeal
When wrapping a box with ribbon, understanding ribbon widths is vital. Wider ribbons, such as 2.5 inches, create a bold look. They make a statement and draw attention. Narrower options, like 0.5 inches, offer a delicate touch. They work well for smaller gifts, providing an elegant finish.
Different widths can change the overall aesthetic of your gift. A wide ribbon creates fullness and can easily disguise imperfections in the wrapping. Narrow ribbons, however, can be tricky. They may require precise placement to avoid overcrowding the small package. Finding balance is key. A mismatched width can detract from the beauty of your gift.
Take time to experiment. While it’s easy to stick to one width, mixing can yield unexpected results. A wide ribbon topped with a narrow one may add depth. Reflect on how your choices affect the visual appeal. It's a learning process that invites creativity, making the gift truly unique.
How to Wrap a Box With Ribbon Perfectly? - Understanding Different Ribbon Widths and Their Impact on Aesthetic Appeal
| Ribbon Width |
Recommended Use |
Aesthetic Appeal |
Best For |
| 1/8 inch |
Small boxes or intricate designs |
Delicate and subtle finishes |
Gift cards, jewelry boxes |
| 1/4 inch |
Medium boxes and accents |
Balanced looks |
Standard gifts, birthday packages |
| 1/2 inch |
Larger boxes and bows |
Bold and eye-catching |
Gift baskets, holiday gifts |
| 1 inch |
Oversized gifts and dramatic looks |
Striking and festive |
Weddings, large celebrations |
Mastering the Basic Ribbon Tying Techniques: Step-by-Step Guide
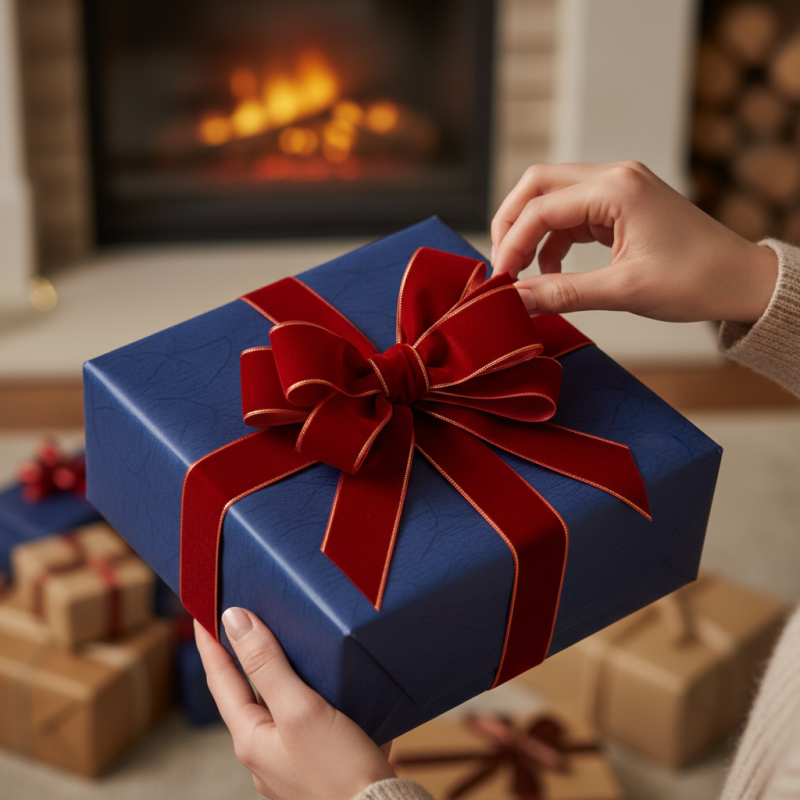
Wrapping a box with ribbon can elevate your gift-giving experience. Mastering the basic ribbon tying techniques is essential. You’ll need a good quality ribbon and scissors. Choose a ribbon that complements your wrapping paper. A satin ribbon can add elegance.
Start by cutting a length of ribbon, making sure it’s long enough to wrap around your box twice. Lay the box flat. Place the ribbon underneath, aligning it in the center. Bring both ends up and cross them over. It’s easy to misalign. Take your time to adjust, ensuring even ends. Slide the ribbon to the desired height on the box.
Now, tie a simple knot. This step can be tricky; the knot shouldn’t be too tight. Leave some slack to reposition later. Create a loop with one end, then wrap the other around it. Pull through and tighten gently. If your bow looks uneven, don’t panic! Unraveling and re-tying is common. Practice makes perfect. After finishing, trim the ribbon ends to avoid fraying. Remember, each attempt helps improve your technique.
Incorporating Industry Techniques for Decorative Bow Creation
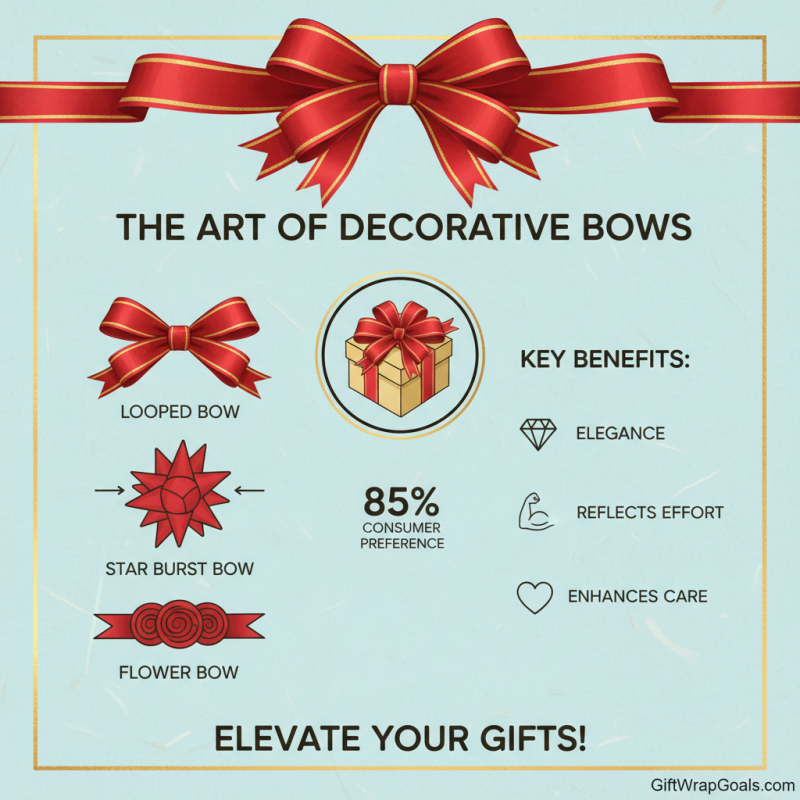
Creating a decorative bow can elevate your gift-wrapping skills. A well-made bow adds elegance. According to industry data, 85% of consumers prefer gifts with standout presentation. Mastering decorative bow techniques not only enhances aesthetics but also reflects effort and care.
Start by selecting the right ribbon. A thick, luxurious satin or a delicate sheer material can create different effects. A 2022 market report revealed that 60% of people notice the ribbon style on gifts. Shaping the bow is critical. Practice looping and tying with precision. Too tight? It may lose its charm. Too loose? It may unravel unexpectedly. Both outcomes require adjustment and reflection.
Incorporate unique elements into your bows. Add small embellishments or layers for depth. Industry experts suggest using contrasting ribbons for a dynamic look. However, balance is essential. Oversaturation can detract from the intended beauty. A bow should enhance, not overwhelm. It’s essential to embrace imperfections in your technique. Each bow crafted is a learning opportunity. Remember, the journey to perfection is often filled with trial and error.
Measuring Ribbon Lengths Accurately to Minimize Waste and Enhance Presentation
Measuring ribbon lengths accurately is essential for gift wrapping.
To minimize waste, start by determining the box's dimensions. Take note of the box’s height, width, and length.
Use these measurements to calculate the amount of ribbon you will need. A common rule of thumb is to multiply the length of the box by 2, then add extra for the bow.
Sometimes, miscalculations happen. You might find yourself short on ribbon after wrapping. This can be frustrating.
To avoid this, always measure twice. Lay the ribbon alongside the box. Make sure it reaches both ends, leaving enough for a bow.
A good bow often requires at least 12 inches. If you’re unsure, add a little extra length.
It’s better to have too much than too little.
Don't be afraid to experiment with different styles. There is no perfect way to tie a bow. Each attempt can be unique.
If the result isn’t satisfying, reflect on what could improve it next time. Adjust your technique or play with the ribbon's texture.
With practice, the wrapping process will feel more natural, and the presentation will shine.